After learning and viewing lots of the IOS 11 reviews from either the social media’s or from anywhere else, you decided to install this version on your device. You installed this version with lots of hope to get hands over to great features and new functions but certainly, you got to see nothing implacable. Now you just started to feel less of your device with that new version installed and finally, you wish to degrade to the previous version iOS only. As you all know that upgrading is simple step to amend your device software but to downgrade there are possibly no direct options available. There has to be some specific method used to downgrade any software or you can say iOS 11 to iOS 10. To help the users easily roll back to the iOS 10 we have written this article where we had imprinted the best method for the same. If you are the one who is willing to roll back to iOS 10 after installing iOS 11 betas, then just go and read the method described in this article. Just read this article until the end to learn the method!
Steps to Roll Back to iOS 10:
#1 First of all download the latest version of Itunes if you haven’t done it yet and then download the iPSW file for your choice. These are the power reset files for the device that can completely restore the device in its newbie state. You should note that the proper iPSW file meant for your device should be downloaded!
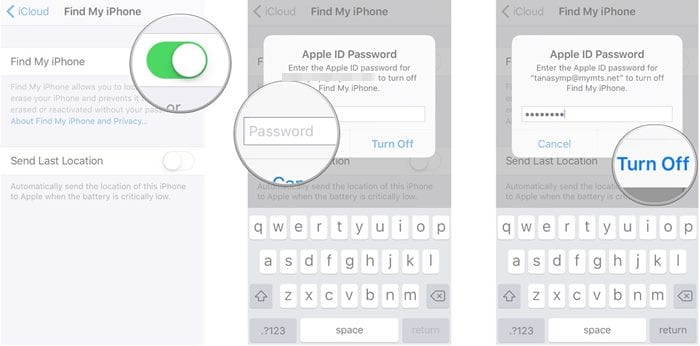
#2 To begin with the Rollback for your ios, first see that you have disabled the Find My iPhonefeature. This is necessary for the method and if you don’t do it then this method would work or may remain to stumble.
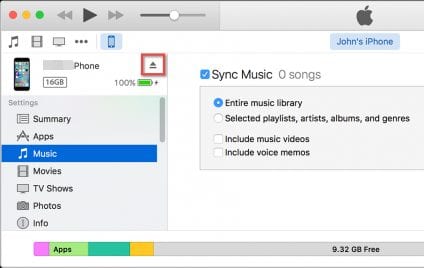
#3 Plug the device into the PC and then open the iTunes simultaneously. You have to make the connection using the data cable. Now inside the iTunes, find and click on the Device icon. This icon will be placed on the top bar of the iTunes so finding it won’t be a big deal.
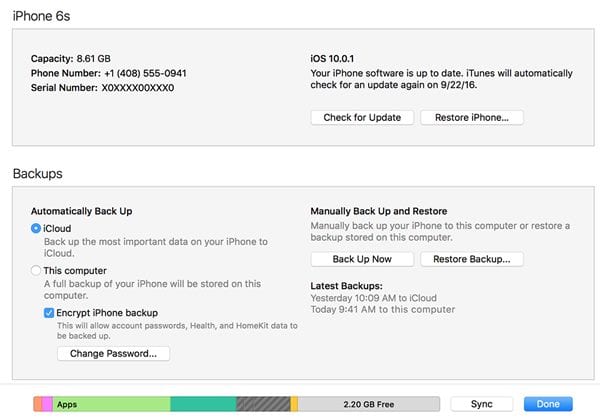
#4 Inside the Summary look for the Device Restore option. Generally, it will be named Restore along with the device name. Click on this option while simultaneously press the Shift or Option key according to Windows or Mac OS. Only this will launch the file browser which is required for this process. If you will not press the keys while clicking on the Restore option then the file browser will not open.
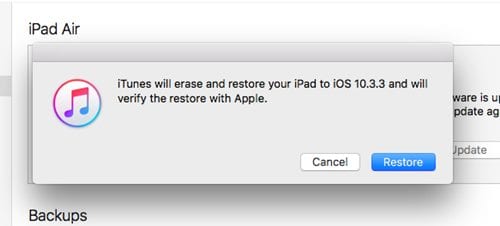
#5 Locate the iPSW file on your computer device through the file browser and open it up. This is quite simple to locate and open any file. Now notice that you will be able to proceed with the Restoration while using the iPSW file. Follow through some of the options and then your device will be started to roll back from iOS 11 beta to iOS 10.
#6 All the device data will get wiped and you will be left with clean and all new looking device from inside with no files or folders left behind. Startup using your device that is now rolled back to the previous version of operating system. This process is totally irreversible so be careful before applying it!
How to Roll Back Your iPhone iOS 11 To iOS 10
 Reviewed by Unknown
on
December 18, 2017
Rating:
 Reviewed by Unknown
on
December 18, 2017
Rating:


